As an aspiring entrepreneur or an existing one, you might be aware of the importance of having an online store. As more and more consumers are shopping online, it has become absolutely imperative to familiarize oneself and learn everything about the ecommerce business. This is applicable to all forms of business – wellness products, fashion goods, or a personalized range of products. The simplest way in which you start your online business is by creating a Shopify website.
The benefits of creating a Shopify website include various customization options, a user-friendly interface and its ecommerce capabilities. We have curated a detailed guide to create a Shopify website. The steps include launching your brand to selling your first product.
A Guide To Building Your Shopify Website
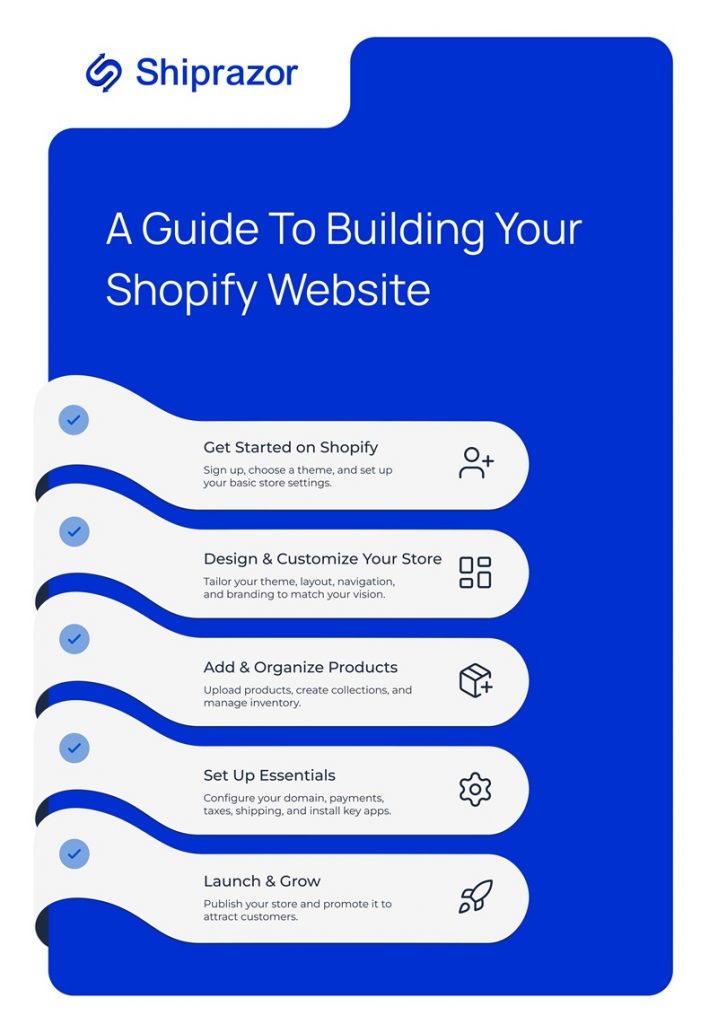
Step 1 – Signing Up On Shopify
You need to visit the website – www.shopify.com and click on “Start Free Trial”. It starts with a 3-day trial and you would be required to choose a plan thereafter. To sign up, you would be required to provide your business name, email address and a password. After you have completed your registration, you would be taken to the admin dashboard. This would act as a command center to manage your online business.
Step 2 – Choosing A Theme
Your user experience depends upon the theme you would choose for your website. You can choose from a range of basic and premium themes to enhance your user’s experience. Select a theme which aligns with your business objectives. You could choose from a range of colours, layouts and fonts. You should opt for a theme which is suitable for both a desktop and mobile version of your website.
Step 3 – Customizing Your Website
There is a drag and drop option on the Shopify website which enables you to customize your website, without having prior coding knowledge. It enables you to customize the header, footer, homepage, colours and fonts. Under the panel “Theme Settings”, you would be able to modify and enhance the look of your website.
Step 4 – Adding Products
The main objective of any website is to sell their products. Therefore, you would need to showcase your products in the most outstanding manner. You need to select “Products” and then click on “Add Product”. After that, you would be required to add the product name, pricing, images, description, etc. You should always use high-quality images to make your product appear more attractive.
The next step would be to set up your inventory. As the last step, you would be required to add the shipping details (weight, fulfillment options, variants. etc.)
Step 5 – Collections & Navigation
You need to group your products on the basis of their type, promotion, or season. This would enable your users to have a seamless shopping experience. In order to create a collection, you need to click on “Products” and then select “Collections”. You will be able to choose from manual or automated products. As the next step, you would be required to link your collection via the “Online Store”. Under the Navigation menu, you can create sub categories such as Home, Best Sellers, New Arrivals, Contact Us, etc.
Step 6 – Configuration
Your website needs to have important sections such as About Us, FAQs, Contact Us and Shipping & Return Policy. This would help you share your brand story, address customer issues, provide resolutions and most importantly, it would help you build your goodwill and trust among the customers.
For this part, just go to Online Store > Pages > Add Page.
Step 7 – Choosing A Domain Name For Your Website
By creating a custom domain name, you will be able to build your credibility. Until you purchase a domain name, Shopify website gives you a temporary one. To purchase a domain name, you need to click on
Setting > Domains > Buy New Domain
Your domain name needs to be brand-relevant, short and have a recall value. Shopify also gives you the option to connect with a domain name that you already own. It automatically handles the DNS setup if you go for the latter option.
Step 8 – Setting Up Of Payments & Taxes
In order to kickstart your payment gateway, you need to click on
Settings > Payments
The next step would be to activate your gateway and check its functionality.
In order to set up your taxes, you need to click on Settings > Taxes and Duties. Shopify would automatically calculate the taxes based on your custom rules and location.
Step 9 – Shipping & Delivery
Shipping is considered to be one of the most important aspects of an ecommerce business. It is done on the basis of your product price, weight and your location. To manage your shopping settings, click on:
Settings > Shipping and Delivery
After this, you will be able to add the shipping zones and prices.
Step 10 – Installation Of Apps
In order to increase the functionality of your website, you could choose from a range of 8000 plus Apps available on the Shopify Store. You should be mindful while choosing apps for your store and only opt for the ones that align with your company’s goals and objectives.
Step 11 – Launching Of Your Shopify Website
Prior to going live, you need to make sure that you place a test order, proofread everything that is live on the website, check your page speed and also test the responsiveness of your mobile. After doing all the checks, you will be able to remove the password protection. You will be able to make your Shopify website live and ready to accept orders.
Step 12 – Promoting Your Store
In order to survive in a competitive market, you will need to market your business. You will be able to do it with the aid of tools like Email Marketing, Social Media Campaigns, Search Engine Optimization and Influencer Collaborations.
Final Thought
In order to launch a successful ecommerce business, you need to create a Shopify website. It is backed with features like customizable design and user-friendly interface. It enables the users to scale, manage and build their website without the prior knowledge of coding or website building.
To build your Shopify website, you need to take into account every minute feature- from choosing a specific layout to launching your social media campaign. You need to invest an ample amount of time and effort into the design, presentation and user experience. All these factors will have a huge impact upon your brand’s revenue and credibility.
A Shopify website is designed to offer the best functionality and flexibility to existing merchants and first-time sellers alike. You will be able to survive and thrive in the online marketplace, while also exploring digital expansion.